Friday, October 14, 2011

How to Cut up Firewood

With winter coming closer with each passing day, many people who have wood stoves or fireplaces are preparing their firewood for the winter.

So how does one chop wood exactly?

Before you begin the task to cutting up your firewood you will need to choose the correct axe for the job. There are single bit, double bit, splitting maul, splitting wedge, and even more tools available for wood chopping.

Be sure that there aren't any people in the vicinity that could be injured, also be aware of the level of the ground, you don't want to get off balance or fall while holding a sharp object.

If you aren't the one chopping, then do NOT stand behind someone who is. Actually it is probably best to steer clear of the axe wielder all together. Better safe than sorry.

Be sure your axe is sharp. As with knives, a dull axe is more dangerous than a sharp one as it can slip or bounce due to the dullness, and an axe that slips off its mark can result in injury.

Let the axe do the work for you. This means that you need a swift controlled swing and relax just before the axe hits the wood. For the last split second you are only guiding the axe. By relaxing it prevents the shock of the striking blade from being transmitted back into tensed up muscles. If you relax then you will allow yourself to be able to chop wood longer.

When splitting wood with an axe, if you strike with the axe head very slightly off perpendicular, it will be less likely to get stuck in the block of wood, but will cause pieces to pop free, these pieces can fly off in any direction so appropriate safety wear is needed (safety goggles, etc.).
  1. Balance the piece of wood that you want to chop (or split) on a chopping block or level ground.
  2. Stand with your feet shoulder width apart.
  3. Hold the axe with both hands. Slide one hand up near the head of the axe, and practice letting it slide down the axe handle toward the other hand as the swing is executed. This maintains control and delivers a more powerful blow.
  4. Put the axe in the spot you want to hit. Study the piece, and note any knots or limbs. You will want to hit a spot between these, as it is much harder to split across these, since they hold the wood together like nails or pins.
  5. Pull the axe carefully over your head, allowing the upper hand to slide up near the ax head. Hold it with the head back over your shoulder with a firm grip.
  6. Bring the axe quickly and firmly down, allowing your hand to slide down the axe handle to the other hand, aiming to hit the exact spot you selected.
It is always a good idea to let someone know when you are going to be chopping wood. You never know what could happen, and having someone aware of your location and what time you began and should be done is always a good thing.

Be safe, if you feel uncomfortable chopping wood, you can purchase it already chopped, or talk to someone who is experienced that could help to teach you the proper method. Never do anything dangerous that you feel uncomfortable about.


Source:
http://www.wikihow.com/Chop-Wood

Thursday, September 22, 2011

What to Do to Your Garden in October

It isn't quite October yet, but it looms just around the corner. A mere 8 days away. So what is there to do in your garden in October?

Harvest: Harvest any fruits and veggies that are now ripening, some things aren't at their peak until fall is upon us.


Weeding: Be sure to not let weeds take over now that your garden is done. It will just make the chore that much harder come spring time.

Clean up: This is a big part of what to be doing in your garden in the fall, getting rid of falling leaves, dead plants, etc. Be sure to add these things to your Compost Pile so you will have a rich soil amendment to use in the spring.

Also during clean up you will want to thoroughly clean your garden tools and store them where they will not be exposed to moisture all winter. You want to keep them from warping or rusting.

What else are you doing to prepare for the winter in your garden?


Tuesday, September 6, 2011

Revisiting Composting

This morning, while checking my email, I was made aware of a very informative article on the art of composting. The article is called 10 Rules to Remember About Composting. It can be found on nannypro.com
Photo from nannypro.com
We will give you a little teaser of this article by sharing 2 of the rules with you here:

Rule # 2:
Remember to turn your compost pile: As the ingredients in your compost pile start to biodegrade they will start to get hot.  To avoid your compost pile rotting and stinking you need to turn the pile to aerate it.  This addition of air into the pile will speed up the decomposition.
Side note: Rule 2 can be made easier with a spinning composter.

Rule # 6:
Never put trash in your compost pile: Just because something says that it is recyclable it doesn’t mean that it should necessarily go into the compost bin.  For example, newspapers will compost and can be put into a compost pile, but you will want to shred the newspapers and not just toss them in the bin in a stack.  Things like plastic and tin should not be put into a compost pile, but can be recycled in other ways.


Be sure to check out the entire list of rules:
http://www.nannypro.com/blog/10-rules-to-remember-about-composting/

Thursday, September 1, 2011

Tomatoes Coming Out of Your Ears?

If you are like me then you have grown your own tomatoes this year, but, I also have family and neighbors giving me their extras because I always took them years before (when I wasn't growing my own). So now I have more tomatoes than I know what to do with. I've gotten several canned and as sauces, etc. But still I have more, and I need a little something different...what about you?


The one option I heard that sounds feasible (as it shrinks the tomatoes, resulting in them taking up less storage space) is dehydrating. But then I began to wonder, what would I used dried tomatoes for?

In talking to some friends and coworkers I found a list of great ideas.
 
Apparently, there are quite a lot of things to used dried tomatoes for (I'm talking recipe wise). Here are a few ideas to get you started:
  • In a salad.
  • Mixed into pasta dishes
  • chopped or minced and mixed with eggs or other breakfast dishes
  • In soups.
  • Stir fried in your favorite Asian dish
  • Used in a sun-dried tomato hummus recipe
  • Used in bruschettas (a drier version of bruschetta anyway)
  • In sandwiches
  • In various "wet" salads, such as potato, chicken, macaroni
The more I've read about using dried tomatoes, the more I've realized that what I thought was going to be a difficult food to find a use for is actually a food that has endless uses. I will definitely be getting out my food dehydrator and taking care of my tomato surplus!!!


Need planting help? Visit Tomato Companion Planting

Tuesday, August 23, 2011

August in the Garden

It is hard to believe that August is already halfway over. Now is the time to go out into your garden, notebook in hand and access how things went over the summer.
  • If you are doing crop rotation, make not of which crops need to go where next spring, it is a good idea to write this down so that you don't forget.
  • Also, now is the time to write down which plants did well and which ones did not. This is especially important if you've never gardened before. It will give you and idea of what plants do best on your land, which will make gardening next year a little easier.
  • Write down any ideas that crop up about what you want to try out next year.
  • If you have perennials that need to be thinned make note of the plants and thin them according to what works best for that specific plant.
  • If you have raspberries, once their harvest is over (should be towards the end of the month) they can be pruned. You will want to prune out the old canes so that new ones will have room to grow.
And of course August is always a great time to be preserving your goodies so get out your pressure canner, waterbath canner, dehydrator, etc. and make your harvest last through winter!


Tuesday, August 16, 2011

Fall Gardening

Many people forget all about their gardens once the main summer growing season is over and the fruits and vegetables have been harvested. But you should know that fall is a great time to grow things in your garden! Plants like cabbage, broccoli, mustard, turnips, kale, and more can be grown in the fall months.

You will want to prepare your soil for your fall garden, especially if it is in the same spot that you had your summer garden in, you can do this by adding aged manure or compost, or if you prefer, chemical fertilizers. Keeping the soil moist is a biggie for a fall garden, one way to help with this is to plant fall plants in a shallow trench and to regularly irrigate the soil.

Or if you choose, you can do a simple container garden for your fall vegetables. One thing that I have found that is great for growing things in is big washtubs with holes drilled in the bottom. Add a 2-3 inch layer of gravel or rock in the bottom before adding your dirt, to allow water to pass through, otherwise your soil can stay too moist and cause the plants' roots to rot.  There are some very colorful cabbages that would make a lovely looking container garden, so that you can enjoy the beauty of nature while waiting for your bounty to ripen enough for eating.

What kind of fall gardening will you be doing?


Wednesday, August 3, 2011

Harvest Time

Many of you have already been harvesting a lot of different fruits and vegetables. And, if you are like me, you know nothing can beat the taste of fresh produce. But what do you do with it all? There are many methods to preserving your foods. From waterbath canning your high-acid foods, pressure canning your low-acid foods, drying, to freezing. Each method is a great way to make sure your produce lasts longer, so that you can enjoy the fruit of your labors on into the winter.

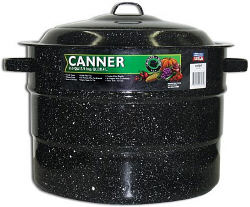
Waterbath canning is a great way to preserve fruits, jams, jellies, preserves, and more! You just need to know if your food is right for waterbath canning (There are a lot of books about canning out there to help with this), a waterbath canner, canning jars, lids, rings, and other canning tools.


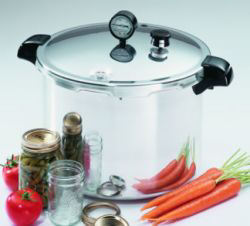
Pressure canning uses a lot of the same types of tools that waterbath canning does, but instead of using a water bath canner you will be using a pressure canner.


Drying your foods is something that has been done for a very long time. However, the methods and efficiency has changed a bit over the years thanks to dehydrators. Now drying food is much quicker than it was in the old days when they dried their foods in smoke or in the sun.


Freezing is definitely a quick way to preserve foods. But you have to worry about air getting to them and causing freezer burn. This can be remedied with a FoodSaver, which vacuum seals food before you put it in the freezer, cutting down on spoilage and freezer burn.


What is your favorite way to preserve your hard worked for harvest goodies?


Want to read more? Check out this blog: Urban Gardens & Pressure Cooking

Monday, June 27, 2011

Buckets from Bucket Outlet - Red Hill General Store


The Real Farmwives of America have been blogging about our buckets from Bucket-Outlet.com

Here is a list of the blogs taken from their website:

DeeDee from Sig....nature Notes gathered fresh cut flowers in her Bucket.
Katie from Pinke Post shows off the Barley Harvest in North Dakota and used her bucket as a centerpiece.

Gal in the Middle gets her nephews to water her flowers with her bucket.

Jen From Mess Hall to Bistro got creative and painted her bucket with chalkboard paint.

Lana used her bucket to chill a bottle of wine on Walking the Off-Beaten Path.

Ott, A is ready to bob for apples with her tub on a Latte with Ott, A

Goodeness Gracious what are they using that bucket for?!?! (You'll have to go see it to believe it.)

3 Kids & Lots of Pigs packed sandwhiches in their bucket before heading out to VBS, Swim Lessons and all their other busy summer activities.

Amy from 2 Maids a Milking Loves Buckets and used her new tub to serve fruit out of.

Four Ransoms kids use their bucket to cool off!

Or you could store bug spray and sun screen in it so you can quickly grab it on your way out the door for summer activities like Leah from Beyer Beware.

Whose the Grown Up, used her bucket for Kitchen utensils.  (Isn't that cute?!?!)

Have Cat's?  Check out how Alarm Clock Wars feeds hers.

Also you can win:


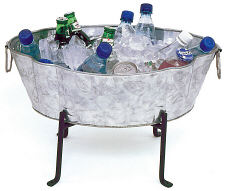
This galvanized embossed tub. (Stand not included)

For more information on how to win visit: http://www.realfarmwivesofamerica.com/2011/06/buckets-of-fun-for-farmwives-and-you.html


Also, we were pleasantly surprised to find that we were mentioned in The Enchanted Tree's Blog. Thank you!

Monday, June 20, 2011

First Time Container Garden Update

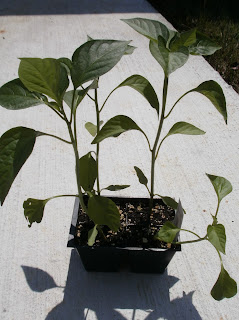
Well our gardener has not been having much luck with her container garden as she has reported to us here at Red Hill General Store. First thing she noticed was just 2 days after planting her peppers the leaves started looking like this:


After doing a little research, she decided to try spraying her peppers with a soapy spray, she used a bit of liquid dish soap, a dab of garlic powder (since she didn't have any fresh garlic cloves), and water.


She mixed all these ingredients her spray bottle and went out to spray her plants before going to bed. Thus far she has not noticed anymore holes in her pepper leaves. If this plan works, she is going to mix a bigger batch and try it in a small pump sprayer.

Unfortunately this was not the only problem that she's had with her container garden. The next problem she is currently working on is figuring out what keeps digging her plants up in the middle of the night and laying them out unharmed on her patio. She has had to replant 4 times already and this is affecting her plants growth. They have not grown hardly any, and Crystal believes that this is due to being constantly dug up. She's hoping to concoct something around her container that will keep whatever is doing this away. She's just not sure if her plants will survive being dug up a 5th or 6th time.

Wonder if she'll catch whatever or whoever is doing this digging in the act?

First Container Garden Posting.

Friday, June 17, 2011

Companion Planting with Marigolds

There are many plant companion settings. Plants that help one another out by promoting healthier growth, warding off certain pests, and helping keep the soil's pH at a healthy level for the plants around them. Today we are going to talk a little about using marigolds as companion plants:


Marigolds are more than just a pretty flower to keep around the home in flower boxes. They also make a great companion plant for most plants, although they can be a little rough on tender herbs. Marigolds produce a pesticide that deters nematodes, with some types of marigold this pesticide can stay in the soil for a year or longer even after the marigold itself is gone. marigolds also deter beetles, beet leaf hoppers, and more.


When planting companion plants together, keep in mind that even plants that help one another in other climates, soil conditions, etc. don't always get along, as we post about companion plants, be sure to always know that each garden will vary slightly from another and what works for some may not work in your garden.

What experiences have you had in planting and/or using Marigolds in and around your garden?

Thursday, June 16, 2011

Companion Planting with Beans

There are many plant companion settings. Plants that help one another out by promoting healthier growth, warding off certain pests, and helping keep the soil's pH at a healthy level for the plants around them. Today we are going to talk a little about using beans as companion plants:


Beans are a great companion for many different plants, just a few are strawberries, beets (view companion planting with beets), carrots, brassicas, radish, and corn. Beans repel California beetles and they fix nitrogen in soil, which is a fertilizer that other plants depend on.

When you harvest beans you might want to keep a basket or large bucket on hand as during good seasons bean plants can grow up to 50 beans per plant. 

When planting companion plants together, keep in mind that even plants that help one another in other climates, soil conditions, etc. don't always get along, as we post about companion plants, be sure to always know that each garden will vary slightly from another and what works for some may not work in your garden.

What experiences have you had in planting and/or growing beans?

Wednesday, June 15, 2011

Companion Planting with Borage

There are many plant companion settings. Plants that help one another out by promoting healthier growth, warding off certain pests, and helping keep the soil's pH at a healthy level for the plants around them. Today we are going to talk a little about using borage as companion plants:


Borage is a pretty blue flower with hairy leaves that can be used as a salad green. It makes a great companion plant with nearly any plant that you might grow in your garden. Borage attracts predator type insects and honey bees while repelling many different types of pests. So grab a garden trowel and add this helpful plant where you need it most.

When planting companion plants together, keep in mind that even plants that help one another in other climates, soil conditions, etc. don't always get along, as we post about companion plants, be sure to always know that each garden will vary slightly from another and what works for some may not work in your garden.

What experiences have you had in planting and/or growing Borage?

Tuesday, June 14, 2011

Companion Planting with Beets

There are many plant companion settings. Plants that help one another out by promoting healthier growth, warding off certain pests, and helping keep the soil's pH at a healthy level for the plants around them. Today we are going to talk a little about using beets as companion plants:


Beets are a great companion plant for Lettuce, Brassicas, Alliums, and Cucumbers (read more about cucumber companion planting). Beets add mineral to the soil which greatly help the before mentioned plants. However, beets should not be planted near runner or pole beans as these types of plants stunt each other's growth.

Beets also make a great container plant. Try using a large round washtub for a container, just be sure to drill holes in the bottom.

What experiences have you head in growing beets in your garden?

Monday, June 13, 2011

Companion Planting with Geraniums

There are many plant companion settings. Plants that help one another out by promoting healthier growth, warding off certain pests, and helping keep the soil's pH at a healthy level for the plants around them. Today we are going to talk a little about using geraniums as companion plants:


 Geraniums help brassicas, tomatoes, grapes, aubergines, roses and peppers by attracting pests such as leaf hoppers and Japanese beetles away from other plants. The Geranium is considered a trap crop when used in this manner.

Keep in mind, when you have your watering can out, that Geraniums do not need much water. In fact if over watered damage that can be hard to reverse will be caused to the plant.

Thursday, June 9, 2011

Companion Planting with Alliums

There are many plant companion settings. Plants that help one another out by promoting healthier growth, warding off certain pests, and helping keep the soil's pH at a healthy level for the plants around them. Today we are going to talk a little about using alliums as companion plants:


When planting companion plants together, keep in mind that even plants that help one another in other climates, soil conditions, etc. don't always get along, as we post about companion plants, be sure to always know that each garden will vary slightly from another and what works for some may not work in your garden.

For planting alliums, you might find it easier to use a bulb planter.

Wednesday, June 8, 2011

First Time Container Gardener

Crystal, one of Red Hill General Store's employees, is trying her hand at gardening. She decided to keep it simple with a container garden and just two varieties of plants.

"Start small, learn from your mistakes, then expand."

She is hoping that this mantra and the fact that she isn't going all out her first year gardening will keep her from getting in over her head. We think she'll be just fine.

For her container, Crystal used a 17 gallon Round Wash Tub.


Her two plants of choice: Mortgage Lifter Tomatoes & Sweet Chocolate Bell Peppers.

Mortgage Lifter Tomato Starter Plants

The Mortgage Lifter Tomato plants that she got at Red Hill General Store in Hillsville, VA are an improved version of 'Radiator Charlie's Mortgage Lifter' tomatoes. These have added disease resistance, a more uniform fruit, they are more red than pink when ripe, and produce a smaller (yet more productive) fruit at 10-14 oz. The Mortgage Lifter Tomato bears fruit until frost. For an interesting history on 'Radiator Charlie's Mortgage Lifter' tomato visit: Tomato Geek.

Sweet Chocolate Bell Pepper Starter Plants

The Sweet Chocolate Bell Pepper is Crystal's experimental plant, while she's always loved tomatoes and definitely enjoys her share of bell peppers, she has never seen or tasted a Sweet Chocolate Bell. This is one pepper that, to Crystal, sounds too delicious to pass up trying to grow on her own.

The Sweet Chocolate Bell Pepper has a sweet flavor, a hint of spiciness, produces a 2 oz., shiny brown, block shaped bell, with 3-or-4 lobes. These peppers can also be harvest in their green stage.


Crystal drilled holes in the bottom of the tub, and put about 1-inch of gravel in the bottom before filling with potting soil. She got the tomatoes and peppers planted just as a huge rainstorm started, so she lucked out on having to water them just yet. She's a little worried that her plants are too close together, but she is going to see what happens. Stakes will come into play as the plants get bigger. And we will keep track of how she is doing and keep you updated on this beginner's container garden. We hope she has a lot of tomatoes to share!


Need ideas for tomatoes? Read: Tomato Use Ideas

Wednesday, June 1, 2011

How to Keep Birds out of Fruit Trees

Yesterday, our sister blog, Bell Outlet Blog, wrote an interesting article with a few tips on keeping birds out of your fruit trees. We feel that this is a topic that our readers would gain a benefit from so we thought we would share one of their tips, but allow you to travel over to their blog to check out the rest.


  • If birds have an even easier food supply to get food from they won't want to bother with the fruit trees. Distract them with bird feeders placed away from the trees (but close enough that they will visit the feeder instead) do a little research on the types of birds that are "visiting" your fruit trees and find out which seeds for your feeder will attract them the most.
 This tip is definitely one that can help to deter birds from eating your hard worked for fruits and possibly even vegetables if you are also having trouble with birds in your garden.

We would love to hear some of your personal tips on keeping birds out of your hard worked for fruits and vegetables!


Monday, May 23, 2011

Gardening Chores for May

For those of you in the southeast, you may want to consider visiting the May Page of Southeast: Organic Gardening's Monthly Garden Calendar. Even if your garden isn't organic many of the tips on that blog can apply to what you need to be doing this time of year. Such as:
  • Clearing out your compost bin.
  • Filling in bald spots.
  • Sow and transplant.
  • Crop care.
  • Plant flowers.
  • Take your spring annuals to the compost bin and replace with summer flowers.
  • Pruning
  • Fertilizing certain plants.
  • Monitor for bugs in your vegetables.
  • Getting rid of invasive pest plants.
 There's lots of things to be doing this month! Good luck and we hope to hear about some of your gardening adventures.


Thursday, May 5, 2011

May is here! Are you Gardening yet?

May is not only here, but we are already 5 days in. Which means many of you are getting ready to start (or already have been) doing some major planting, transplanting, etc. as the average last frosting date here in the mountains of Virginia is between May 10th and 15th.

While browsing the internet, we came across a planting calender that Virginia Tech has on their website (it is in .pdf format) We hope that you find the information there helpful.

With all the rain that we've been having lately it might be a good time to start thinking about rain barrels. It is hard to determine whether a summer is going to be a rainy or dry one, but by storing water from times of plenty for use in times of drought you can save yourself a lot of heartache of your gardening dying from not enough water.

We hope that everyone has gotten a great start to their gardens and we would love to hear about your experiences with your gardens this year!


Read up on Gardening Chores For May.

Monday, April 11, 2011

Attracting Birds to Your Yard

Birds are definitely a creature that humans have found fascinating for years. Perhaps it is their simple beauty, the gorgeous songs they trill so happily, or the intrigue that humans have with animals of flight. Watching these magnificent creatures is a past time that many people share. And there are a few things that you can do to bring birds to your backyard so that you can enjoy watching these carefree, playful little creatures of the air.

For the main part, if you have food and a source of water in your backyard for your little feathered friends, then you are already off to a good start.


For attracting certain birds you will need certain types of food. As each breed has its own preference.

Depending on the type of food you will need a proper bird feeder, if you are using bird seed, then you will need a tube feeder or hanging feeder. For Suet Cakes, you will need a suet feeder, and for that sweet syrupy stuff that hummingbirds love you will need a humming bird feeder. (My personal favorite is the strawberry hummingbird feeder.)

A few types of Bird Seed and a few of the birds that each attracts (each different seed attracts more birds than we have listed, but we will give you at least 3 birds that are attracted to each):

Sunflower Seeds:
-Cardinals
-Juncos
-Woodpeckers

Peanut Hearts:
-Chicadees
-Titmice
-Grosbeaks

Cracked Corn:
-Jays
-Sparrows
-Doves

Nyger:
-Finches
-Pine Siskins
-Buntings


At Red Hill General Store we carry several varieties of Bird Food including seeds and suet cakes, each blend attracts a variety of birds to your yard.

And a photo a Red Hill Employee got of a Woodpecker on her backporch:


Have fruit trees that you'd rather not have birds in? Read How to keep birds out of fruit trees.

Monday, April 4, 2011

Gardening Poll

On Red Hill General Store's Facebook Page, we asked our fans this question:

We want to know how many of you are planning on gardening this year:

And the results of the 30 answers that we received were quite encouraging.

50% of those polled said: I am definitely having a garden.
36% said: I might have a small garden.
13% replied: No garden this year, maybe next year.
and
0% said I do not garden.

So it seems that here at Red Hill General Store around 86% of our customers and fans lean towards some sort of gardening, whether it is container gardening, flower gardening, or vegetable gardening. That is more people than we had thought. Which is a great thing, especially since we offer a variety of gardening equipment, supplies, and decor.


So to our readers are you planning on gardening this year? If so what are your plans for that garden? Need help starting a garden? Read our blog on how to start a garden.

Wednesday, March 23, 2011

Urban Container Gardens

We have discussed gardening for people who have larger yards or some land. But what about those of you who do not have the luxury of living out in the country, but want a garden of your own? Well today we are going to go over a few basics of Urban Gardening to try to help you out.

Today we will focus on container gardens; these are great if you have a balcony, sunny window, roof, or patio area where you don't have any usable dirt, but have space to keep containers.

You will want to plan your container garden, just as someone who uses land needs to plan their plot. You will need to look up your USDA zone so that you know which plants grow the best in your region. After discovering which plants grow best, you will need to decide which of those plants are ones that you want to grow.

With a little practice, experimenting, and hard work nearly any plant that grows in the ground can thrive in a container. However, if this is your first try you might want to stick with plants that are easier to get going until you gain more practice and skill with gardening.

Nearly any container that has holes in the bottom for drainage can be used for your container garden. You can easily use a galvanized bucket or tub as a planter for your container garden, just drill some holes in the bottom. Now keep in mind if you are going to have your container inside near a sunny window, you will want something underneath your container in order to catch the excess water that will run out.

When filling your container with soil keep in mind the needs of the plants that you will be growing so that you can be sure you have the proper soil pH. You might also want to go ahead and purchase fertilizers etc that are recommended for your plants so that you will have them on hand if needed.

Watering is a tricky aspect to container gardening. You will want to water them thoroughly when you water them, but you will not want to water them too much. As you can kill a plant by over and under watering.

Now, there will be the occasional failure, even the most experienced container gardener experiences these. But as you get more experienced the failures will become further between, and you will learn ways to recognize when a plant is failing and how to bring it back from the brink.

And as always, we love to hear from YOU! So please let us know about your experiences with container gardening, which plants worked the best, what tricks have you learned?


View one of our employees first container garden attempt.

Friday, March 18, 2011

Composting

Composting is a wonderful way to naturally give your garden the fuel it needs to thrive.  Composting is also environmentally responsible, as it is using things that ordinarily would find their way into the landfills which are already full enough. It can also save you money on buying compost in the store, and by lessening the garbage that you need to haul off each week, if you also recycle your metals, papers, and plastics, adding composting to your routine can save you quite a bundle in what you are paying to the landfills (if you live in an area that charges for garbage pick up or drop off).

Just what is so great about composting anyway? Well, composting is great for many things; it is good for your garden and the environment. Compost is good for the soil in your garden as it gives your plants a slow, steady, nearly continuous stream of nutrients that they need while they are growing.  In addition to the reasons that we already mentioned that composting is good for the environment (less waste going to landfills) it also improves it due to creating less of a need for chemical fertilizers. And less chemicals is almost always a good thing.

Well, we’ve been convinced that composting is a good, no a GREAT thing. So how does one get started composting?

To make compost you need to bring together items that are mainly green and moist, such as grass clippings, weeds, kitchen scraps, etc. Also you will need to add in some brown ingredients like dead leaves, hay, wood shavings, saw dust, hay, and so forth. Make sure that your items stay moist and turn every few days to make sure oxygen is getting reintroduced to the pile. You can do this with a pitchfork or a compost aerator. However, if you are using a spinning compost container, the action of spinning it will aerate your compost for you. 

Now, you might want to reduce the size of your compost ingredients by chopping them up, or in the case of leaves you can use a lawn mower or mulcher to decrease their size. This will help your compost break down more quickly.

When you add your ingredients together you will want to layer them in 3 to 4 inch think layers (however if using a spinning container you can just chuck them all in there together). The ratio you will want to stay close to is between a 5:1 and 8:1 by volume of brown materials to green materials. However, if the ratio is off then there are ways to tell how to get back on track.

If after 24 hours your compost pile has not heated up you most likely need more green material. The best way to gauge whether or not your pile is getting warmer is by using a thermometer, or more particularly a compost thermometer. 150-160 degrees Fahrenheit is where you want the temperature of the middle of your compost heap to be. Now on the other end of things, if your compost smells like ammonia then you need some more brown materials. Once these are added and mixed into your compost then that smell should dissipate.

Your compost mixture should remain moist throughout the process (not sopping wet however). Between the moistness and the oxygen that the compost is getting from you aerating it your mixture will soon become compost. The more frequently you aerate your mixture the quicker your compost will be ready.


Now, once your compost is done there are several uses for it. You can add it to garden soil, container mixes, or use it as mulch. If there are still coarse pieces in the compost you may want to sift your compost through a “riddle” or garden sieve. Any large pieces that are left can be added to your ingredients for your next composting adventure.

Composting ingredients: (a few ingredient ideas to get you started)

Brown Ingredients:
Leaves
Paper
Cardboard
Hay
Woody Prunings
Straw
Eggshells
Tea Bags
Corn Cobs
Saw Dust

Green Ingredients:
Vegetables
Fruit
Grass Clippings
Fresh Manure
Coffee Grounds
Young Hedge Trimmings
Seaweed
Feathers
Plant Cuttings


Thursday, March 17, 2011

Seeding Your Garden

Planting the seeds in your garden can be a time consuming task, even in a smaller garden. If gardening is something that you practice yearly, you might find yourself wondering if there is something that can make this task just a little bit easier.  If this a question that has been weighing on your mind, then you are in luck as there are definitely items out there that are made specifically for this task.  One of those items we are going to be talking about today.

The item that we mentioned above is none other than the Earthway Precision Garden Seeder.  This neat little machine is one that can ease many of the troubles that come with seeding your garden by hand, one of those troubles being back pain with frequent bending and stooping, using a Garden Seeder can help to alleviate this problem. As with any product, you should always read all the instructions that come with the garden seeder before using it. If you want to know how to properly work a garden seeder before making the investment in one, the instructions for the Earthway Precision Garden Seeder can be found on our earthway-outlet.com Web site.

But we are going to give a few pointers here for your convenience:
  • You will want to be sure that your seeds are dry before putting them into the seeder, as damp or wet seeds can clog the garden seeder up.
  • Also, you will want to be sure that the seeds you are using will properly fit with the seed plate that you are using (there are many different seed plates available for the Earthway Precision Garden Seeder)
  • The hopper needs to be kept clean so that the seeds will be evenly distributed during the seeding process. 
  • There is an attachment for the Earthway Precision Garden Seeder that is used for fertilizing. If you decide to purchase this item with your garden seeder, keep in mind that you cannot seed and fertilize at the same time. However, even using the garden seeder twice still saves time over doing both of these things by hand.
We hope that you have a wonderful experience in your garden this coming year. If there are any blogs that you want to see about gardening please let us know either in the comments or by emailing us at crystal@redhillgeneralstore.com 

  Did you know that you don't have to have a lot of space for a garden? Read Urban Container Gardening for more info.

Wednesday, March 16, 2011

Starting a Garden

There are many things that you need to do before you even start your garden in order to prep yourself for the planting season.  Many of these things are common sense, but some are not. We hope that those of you who have never gardened before, have dabbled in gardening, and maybe even some expert gardeners will find some of these tips and instructions helpful on your path to creating your ideal vegetable garden this year.


Before you begin, you will need to have an idea about what types of vegetables you will be wanting to plant. We recommend only growing vegetables that you and your family thoroughly enjoy, especially for your first few years gardening. As you gain more experience you might want to try new vegetables, there are some that you might like when they are fresh that you never enjoyed the grocery store canned versions of. Once you know which plants you want, you will need to find out what they need for the best growth conditions, this step will help you to plan how you are going to plant your garden, once you have chosen your garden's location you will want to use your research and draw out a map of where you want to plant each vegetable allowing room for plants to grow, also while you are doing this, you might want to write out a planting schedule if you are using a big variety of plants that need to be planted at different times of the year. If you are ordering seeds, you will want to go ahead and place your order. And this brings us to the next step:

Where should your garden be located? If you have a small yard you may not have much choice on where to locate your garden, however, if you have a large area that  you can choose from there are some things that you will want to keep in mind when deciding which spot to place your garden in.  You will want to choose a spot on your land that receives at least 6 hours of sunlight a day. Sunlight is the best light for plants and most vegetable plants need a lot of it. The soil type is also a good thing to keep in mind when choosing your garden's location. Many people are surprised at how much the pH of their soil can vary from one spot of their yard to the next. Now, even if your soil is not perfect you can take measures to balance the soil. You will need to do a soil test in order to determine what the pH level of your soil is. We have written a blog about soil testing on Red Hill General Store's blog.

You will also want to be sure that your garden is either located near a source of water, or that you have the means to transport water to it. Water is vital to a garden's survival. Also, your garden will need to be located in a place that is convenient for you to tend to it frequently. Gardens do have a bit of upkeep, and you are more likely to achieve this upkeep if your garden is located where you can easily have access to it.

When deciding how big your garden needs to be, you will need to factor in how many people you intend to feed with your garden, and also how much work you want to do in your garden. We feel that it is okay to have a smaller garden, especially if this is your first one and you are learning the ropes. You do not want to overwhelm yourself in the process.

Now, you will want to take your information from your soil test and determine if you need to add nutrients to your soil in order to balance the pH of it for the next step. for this step you will want to break up the soil in the area that you have determined to have your garden in and you will want to add some compost and whatever your pH test determined that you need. After adding this to the top of your soil you will want to till everything so that it mixes well with the topsoil in your garden. Tilling can be done with one of our Earthway Cultivators.

One thing that can make planting a bit easier, is to take the plan that you drew out earlier, and use a hoe or shovel, to transpose that plan from your paper to the soil. This will help you to determine if the plan you drew will genuinely work in your garden location. This is best to do before planting anything so that you can easily redraw your plan up if you find that something needs to be changed. Now if your plan is good to go, you will want to apply fertilizer and use a rake to blend it in with the soil so that the fertilizer does not burn your seeds.

Going by your schedule that you wrote out for your plantings, you can start planting your garden. You may want to do a little further research on your seeds to find out what types of rows they work best in, and the best way to sow a certain type of seed.

Follow our Blog for further postings on how to maintain your garden, container gardening, and more!


Ready to start gardening? Read more at Seeding a Garden.

Tuesday, March 15, 2011

Red Hill General Store's Outdoor and Gardening Blog

We are bringing you a blog that ties in with several of our sister sites. Sprayer-outlet.com and Earthway-outlet.com are just two of our Web sites that we will feature products, projects, advice, and ideas from on this blog.

Once harvest season rolls in we will also feature some tips from Pressurecooker-outlet.com.

We want to know what kind of blogs and information you want to see about the outdoors and gardening. What type of information are you needing this coming year?

Some great places to start:
Starting a Garden
Urban Container Garden
Harvest Time

Related Posts Plugin for WordPress, Blogger...