Friday, October 14, 2011

How to Cut up Firewood

With winter coming closer with each passing day, many people who have wood stoves or fireplaces are preparing their firewood for the winter.

So how does one chop wood exactly?

Before you begin the task to cutting up your firewood you will need to choose the correct axe for the job. There are single bit, double bit, splitting maul, splitting wedge, and even more tools available for wood chopping.

Be sure that there aren't any people in the vicinity that could be injured, also be aware of the level of the ground, you don't want to get off balance or fall while holding a sharp object.

If you aren't the one chopping, then do NOT stand behind someone who is. Actually it is probably best to steer clear of the axe wielder all together. Better safe than sorry.

Be sure your axe is sharp. As with knives, a dull axe is more dangerous than a sharp one as it can slip or bounce due to the dullness, and an axe that slips off its mark can result in injury.

Let the axe do the work for you. This means that you need a swift controlled swing and relax just before the axe hits the wood. For the last split second you are only guiding the axe. By relaxing it prevents the shock of the striking blade from being transmitted back into tensed up muscles. If you relax then you will allow yourself to be able to chop wood longer.

When splitting wood with an axe, if you strike with the axe head very slightly off perpendicular, it will be less likely to get stuck in the block of wood, but will cause pieces to pop free, these pieces can fly off in any direction so appropriate safety wear is needed (safety goggles, etc.).
  1. Balance the piece of wood that you want to chop (or split) on a chopping block or level ground.
  2. Stand with your feet shoulder width apart.
  3. Hold the axe with both hands. Slide one hand up near the head of the axe, and practice letting it slide down the axe handle toward the other hand as the swing is executed. This maintains control and delivers a more powerful blow.
  4. Put the axe in the spot you want to hit. Study the piece, and note any knots or limbs. You will want to hit a spot between these, as it is much harder to split across these, since they hold the wood together like nails or pins.
  5. Pull the axe carefully over your head, allowing the upper hand to slide up near the ax head. Hold it with the head back over your shoulder with a firm grip.
  6. Bring the axe quickly and firmly down, allowing your hand to slide down the axe handle to the other hand, aiming to hit the exact spot you selected.
It is always a good idea to let someone know when you are going to be chopping wood. You never know what could happen, and having someone aware of your location and what time you began and should be done is always a good thing.

Be safe, if you feel uncomfortable chopping wood, you can purchase it already chopped, or talk to someone who is experienced that could help to teach you the proper method. Never do anything dangerous that you feel uncomfortable about.


Source:
http://www.wikihow.com/Chop-Wood

Thursday, September 22, 2011

What to Do to Your Garden in October

It isn't quite October yet, but it looms just around the corner. A mere 8 days away. So what is there to do in your garden in October?

Harvest: Harvest any fruits and veggies that are now ripening, some things aren't at their peak until fall is upon us.


Weeding: Be sure to not let weeds take over now that your garden is done. It will just make the chore that much harder come spring time.

Clean up: This is a big part of what to be doing in your garden in the fall, getting rid of falling leaves, dead plants, etc. Be sure to add these things to your Compost Pile so you will have a rich soil amendment to use in the spring.

Also during clean up you will want to thoroughly clean your garden tools and store them where they will not be exposed to moisture all winter. You want to keep them from warping or rusting.

What else are you doing to prepare for the winter in your garden?


Tuesday, September 6, 2011

Revisiting Composting

This morning, while checking my email, I was made aware of a very informative article on the art of composting. The article is called 10 Rules to Remember About Composting. It can be found on nannypro.com
Photo from nannypro.com
We will give you a little teaser of this article by sharing 2 of the rules with you here:

Rule # 2:
Remember to turn your compost pile: As the ingredients in your compost pile start to biodegrade they will start to get hot.  To avoid your compost pile rotting and stinking you need to turn the pile to aerate it.  This addition of air into the pile will speed up the decomposition.
Side note: Rule 2 can be made easier with a spinning composter.

Rule # 6:
Never put trash in your compost pile: Just because something says that it is recyclable it doesn’t mean that it should necessarily go into the compost bin.  For example, newspapers will compost and can be put into a compost pile, but you will want to shred the newspapers and not just toss them in the bin in a stack.  Things like plastic and tin should not be put into a compost pile, but can be recycled in other ways.


Be sure to check out the entire list of rules:
http://www.nannypro.com/blog/10-rules-to-remember-about-composting/

Thursday, September 1, 2011

Tomatoes Coming Out of Your Ears?

If you are like me then you have grown your own tomatoes this year, but, I also have family and neighbors giving me their extras because I always took them years before (when I wasn't growing my own). So now I have more tomatoes than I know what to do with. I've gotten several canned and as sauces, etc. But still I have more, and I need a little something different...what about you?


The one option I heard that sounds feasible (as it shrinks the tomatoes, resulting in them taking up less storage space) is dehydrating. But then I began to wonder, what would I used dried tomatoes for?

In talking to some friends and coworkers I found a list of great ideas.
 
Apparently, there are quite a lot of things to used dried tomatoes for (I'm talking recipe wise). Here are a few ideas to get you started:
  • In a salad.
  • Mixed into pasta dishes
  • chopped or minced and mixed with eggs or other breakfast dishes
  • In soups.
  • Stir fried in your favorite Asian dish
  • Used in a sun-dried tomato hummus recipe
  • Used in bruschettas (a drier version of bruschetta anyway)
  • In sandwiches
  • In various "wet" salads, such as potato, chicken, macaroni
The more I've read about using dried tomatoes, the more I've realized that what I thought was going to be a difficult food to find a use for is actually a food that has endless uses. I will definitely be getting out my food dehydrator and taking care of my tomato surplus!!!


Need planting help? Visit Tomato Companion Planting

Tuesday, August 23, 2011

August in the Garden

It is hard to believe that August is already halfway over. Now is the time to go out into your garden, notebook in hand and access how things went over the summer.
  • If you are doing crop rotation, make not of which crops need to go where next spring, it is a good idea to write this down so that you don't forget.
  • Also, now is the time to write down which plants did well and which ones did not. This is especially important if you've never gardened before. It will give you and idea of what plants do best on your land, which will make gardening next year a little easier.
  • Write down any ideas that crop up about what you want to try out next year.
  • If you have perennials that need to be thinned make note of the plants and thin them according to what works best for that specific plant.
  • If you have raspberries, once their harvest is over (should be towards the end of the month) they can be pruned. You will want to prune out the old canes so that new ones will have room to grow.
And of course August is always a great time to be preserving your goodies so get out your pressure canner, waterbath canner, dehydrator, etc. and make your harvest last through winter!


Tuesday, August 16, 2011

Fall Gardening

Many people forget all about their gardens once the main summer growing season is over and the fruits and vegetables have been harvested. But you should know that fall is a great time to grow things in your garden! Plants like cabbage, broccoli, mustard, turnips, kale, and more can be grown in the fall months.

You will want to prepare your soil for your fall garden, especially if it is in the same spot that you had your summer garden in, you can do this by adding aged manure or compost, or if you prefer, chemical fertilizers. Keeping the soil moist is a biggie for a fall garden, one way to help with this is to plant fall plants in a shallow trench and to regularly irrigate the soil.

Or if you choose, you can do a simple container garden for your fall vegetables. One thing that I have found that is great for growing things in is big washtubs with holes drilled in the bottom. Add a 2-3 inch layer of gravel or rock in the bottom before adding your dirt, to allow water to pass through, otherwise your soil can stay too moist and cause the plants' roots to rot.  There are some very colorful cabbages that would make a lovely looking container garden, so that you can enjoy the beauty of nature while waiting for your bounty to ripen enough for eating.

What kind of fall gardening will you be doing?


Wednesday, August 3, 2011

Harvest Time

Many of you have already been harvesting a lot of different fruits and vegetables. And, if you are like me, you know nothing can beat the taste of fresh produce. But what do you do with it all? There are many methods to preserving your foods. From waterbath canning your high-acid foods, pressure canning your low-acid foods, drying, to freezing. Each method is a great way to make sure your produce lasts longer, so that you can enjoy the fruit of your labors on into the winter.

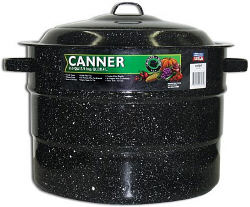
Waterbath canning is a great way to preserve fruits, jams, jellies, preserves, and more! You just need to know if your food is right for waterbath canning (There are a lot of books about canning out there to help with this), a waterbath canner, canning jars, lids, rings, and other canning tools.


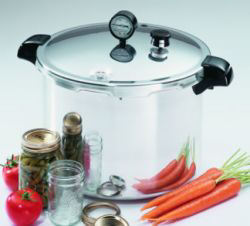
Pressure canning uses a lot of the same types of tools that waterbath canning does, but instead of using a water bath canner you will be using a pressure canner.


Drying your foods is something that has been done for a very long time. However, the methods and efficiency has changed a bit over the years thanks to dehydrators. Now drying food is much quicker than it was in the old days when they dried their foods in smoke or in the sun.


Freezing is definitely a quick way to preserve foods. But you have to worry about air getting to them and causing freezer burn. This can be remedied with a FoodSaver, which vacuum seals food before you put it in the freezer, cutting down on spoilage and freezer burn.


What is your favorite way to preserve your hard worked for harvest goodies?


Want to read more? Check out this blog: Urban Gardens & Pressure Cooking

Related Posts Plugin for WordPress, Blogger...